Cryptocurrency mining continues to be a popular way to earn digital assets, but mining individually often results in irregular payouts and high variance. To increase the consistency of rewards, many miners choose to join a mining pool. Knowing how to set up and configure mining software to join a pool is essential for successful mining. This article will guide you through the steps to get started.
What Is a Mining Pool?
A mining pool is a group of miners who combine their computing power to increase the chances of mining blocks. Rewards are then distributed among participants based on their contributed hash power. Joining a pool can improve earnings stability compared to solo mining.
Step 1: Choose the Right Mining Pool
Before configuring your software, select a mining pool that suits your cryptocurrency of choice, payout structure, fees, and reputation. Popular pools include Slush Pool, F2Pool, and Ethermine.
Consider:
- Pool fees (usually 1-3%)
- Server locations (choose one close to reduce latency)
- Payment methods (PPS, PPLNS)
- Minimum payout thresholds
Step 2: Select Compatible Mining Software
Mining software varies by coin and hardware type (ASIC or GPU). Examples include:
- CGMiner (ASIC and GPU mining)
- BFGMiner (ASIC mining)
- Claymore (Ethereum GPU mining)
- NiceHash (simplified interface, supports multiple coins)
Download the software compatible with your system and hardware.
Step 3: Download and Install the Mining Software
- Visit the official website of the mining software.
- Download the version suitable for your operating system (Windows, Linux, macOS).
- Extract or install the software following provided instructions.
Ensure your system’s drivers, especially GPU drivers, are up to date.
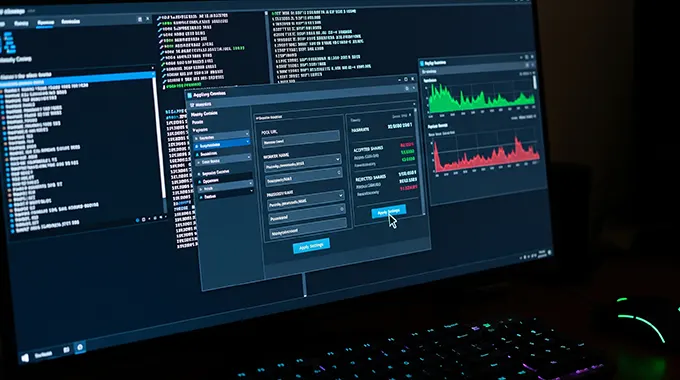
Step 4: Configure the Mining Software to Join a Pool
Most mining software uses a configuration file or command-line parameters to set the pool connection. Key settings usually include:
- Pool URL (server address)
- Port number
- Your worker name or mining account ID
- Worker password (if required)
Example configuration for CGMiner:
cgminer.exe -o stratum+tcp://pooladdress:port -u username.worker -p password
Replace:
- pooladdress with the mining pool’s server address
- port with the relevant pool port number
- username.worker with your pool username and worker ID
- password with your pool worker password
Some pools provide ready-made configuration files or guides to simplify setup.
Step 5: Test and Start Mining
Run the mining software and monitor the output console. You should see:
- Successful connection to the pool
- Share submissions
- Accepted shares count
If there are errors, double-check your pool URL, credentials, and firewall settings.
Step 6: Monitor Your Mining Performance
Most mining pools offer dashboards to track your mining statistics, such as hash rate, shares accepted, and earnings. Regularly check these dashboards to optimize your setup.
Tips for Optimal Mining Pool Configuration
- Use the pool server closest to your geographical location to reduce latency.
- Create multiple workers if you use multiple mining rigs.
- Set up auto restart scripts or software to minimize downtime.
- Regularly update your mining software for bug fixes and improved performance.
Knowing how to set up and configure mining software to join a pool is key to effective cryptocurrency mining. By selecting the right pool, choosing compatible software, and correctly configuring your miner, you can improve your chances of earning rewards consistently. Always stay informed about the latest mining developments and best practices to maximize your mining success.